Running GoPxL on a Windows PC
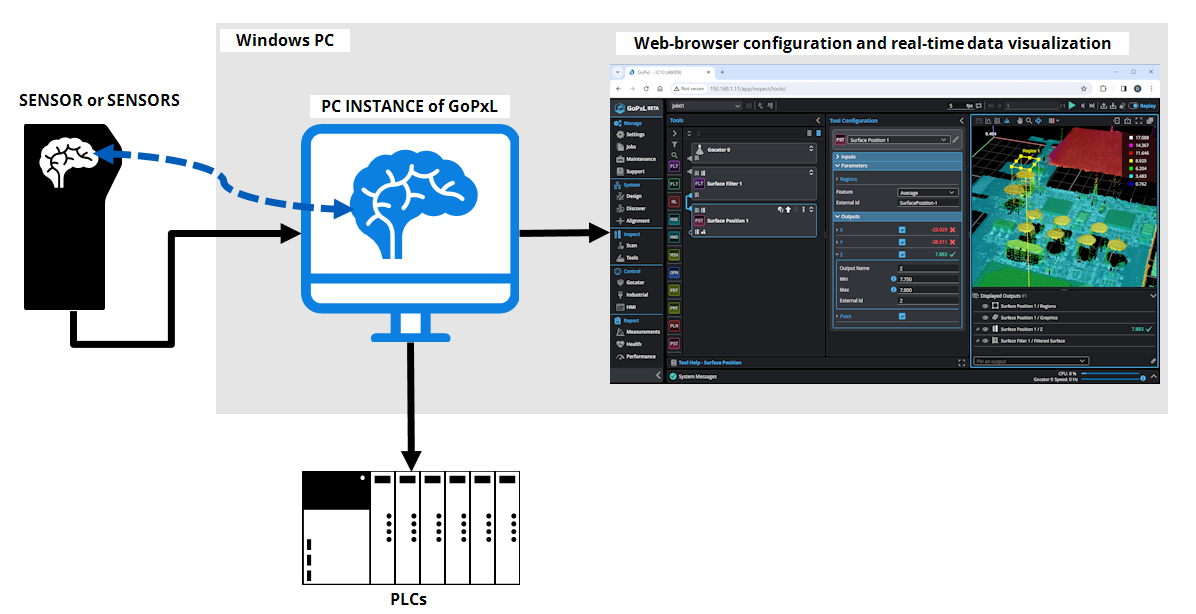
GoPxL is the software you use to configure Gocator sensors. Typically, you connect directly to a sensor's IP address via a web browser, and use the GoPxL software running on the sensor to configure and run the sensor. (By default, a sensor's IP address is 192.168.1.10. If you can't find a sensor, see GoPxL Discovery Tool.)
You can also run GoPxL on a Windows PC. We call GoPxL running on a PC a "PC (or local) instance of GoPxL." If your Windows account has Administrator rights, you can install a PC instance of GoPxL as a windows "service." A PC instance installed (and running) as a service can run a sensor without the need for a user to be logged into Windows.
A PC instance of GoPxL lets you do the following:
-
Accelerate sensors: For applications where performance is critical, you should run a sensor through a PC instance of GoPxL. After you connect a sensor to GoPxL running on a PC, the instance automatically starts accelerating it, handling the processing of the scan data, rather than the sensor. This improves system performance, potentially letting you increase scan rates or add more tools. For more information, see Accelerating a Sensor.
- Load previously recorded scan data to examine it or to configure measurement tools offline, without a sensor, using that data. For more information, see Loading Scan Data.

|
For information on the ports a PC instance uses (for example, in order to ensure ports are not blocked over your network), see Required Ports. |
If your Windows account has Administrator rights, you can install a PC instance of GoPxL as a windows "service." A PC instance installed (and running) as a service can run a sensor without the need for a user to be logged into Windows. For more information, see Instance Settings
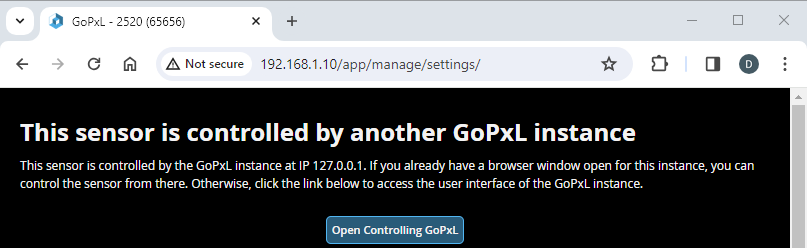
The user interface of GoPxL running on a sensor and GoPxL running on a PC is almost identical. When running a sensor through a PC instance of GoPxL, you can't upgrade or restart the sensor. You must remove the sensor from the PC instance and then connect to the sensor directly to upgrade the sensor.
|
|
Job files you create in a PC instance of GoPxL are separate from any jobs that are on the sensor. Be sure to back them up if ever you need to run them directly on the sensor. |
System Requirements
The following are the system requirements for using GoPxL on a Windows PC:
- Processor: x86-64 (Core i3 or equivalent)
- RAM: 8 GB
- Hard drive: 64 GB
- Operating system: Windows 10 (32-bit and other OS are not supported)
- Display: 1366 x 768
To accelerate more sensors or to run the system at higher speeds, use a computer with more system resources.
When using GoPxL on a Windows PC to accelerate a G3, the PC instance can make use of a graphics card with CUDA support. However, the following requirements must be met:
- A CUDA compatible graphics card.
- A graphics card with a "Compute Capability" greater than 5.2. To determine whether a card fulfils this requirement, see NVIDIA's CUDA GPUs page.
- The latest NVIDIA graphics card driver version. LMI recommends downloading the driver directly from the NVIDIA website to get the driver, rather than using the Windows Device Manager.
Launching GoPxL on a Windows PC
The first time you launch GoPxL for Windows, a GoPxL instance is automatically created and started, and the GoPxL interface opens in your default browser. You use the GoPxL Manager application (which is started when you start GoPxL.exe) to add, remove, and configure instances. The following assumes you have connected a sensor to a network and that you can access its web interface.

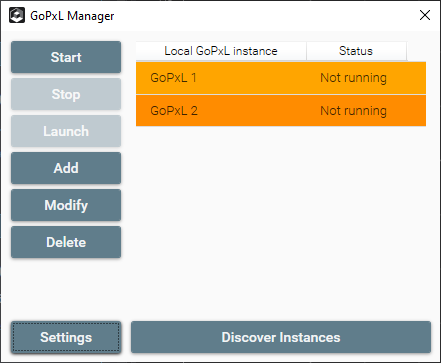
The GoPxL Manager application. An instance is automatically added the first time you launch GoPxL.
To launch a PC instance of GoPxL
| 1. | On the PC connected to the sensor, download and unzip the GoPxL Utilities package (14631-x.x.x.x_SOFTWARE_GoPxL_Utilities.zip). |
The version of the package must match the version of GoPxL on the sensor.
| 2. | From the GoPxL folder, launch GoPxL x64. |
GoPxL Manager creates a local, PC-based instance of GoPxL and launches it in a new tab in your default browser, using IP address 127.0.0.1.
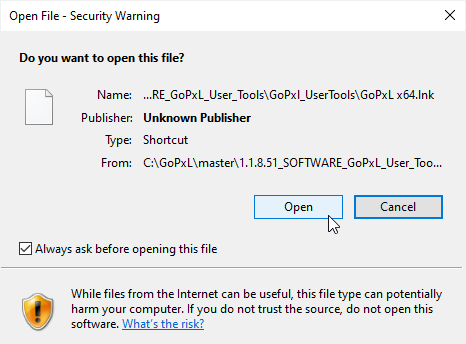
Windows may display a security warning asking if you want to launch GoPxL. Click Open to continue.
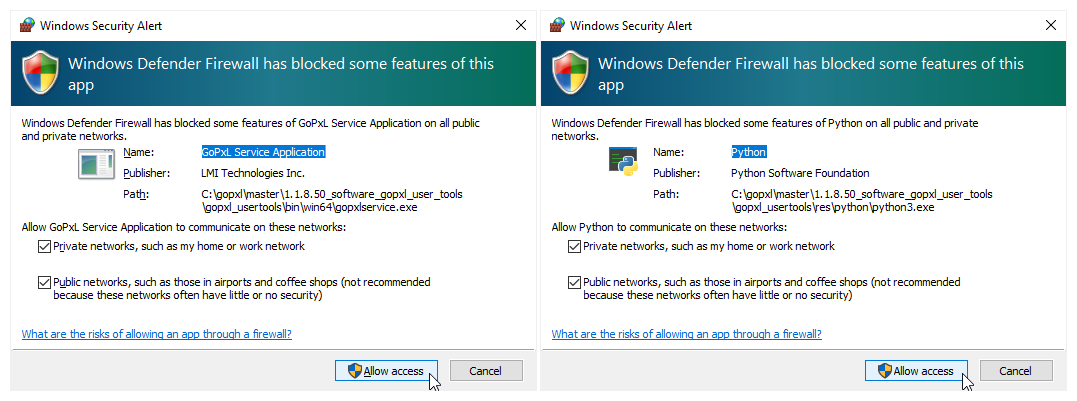
Additionally, your firewall may ask if you want to allow the GoPxL Service Application and Python to communicate over your network. To avoid issues, LMI recommends allowing communication over both Public and Private networks. Because the notifications appear one on top of the other, make sure to check the appropriate boxes and carefully click Allow access for both alerts.
At this point, you can do one of the following:
-
Add one or more sensors to the PC instance to accelerate the sensors. For information on adding a sensor to a sensor group, see Accelerating a Sensor.
-
Open scan data someone has previously recorded (in a .gprec, .gpbak, or .gpsup file) and examine the data or use it to configure measurement tools without taking your sensor system offline. For more information, see Loading Scan Data. (For information on the file formats used with GoPxL, see File Formats.)
All ports used by PC instances must be unique. In some situations, it is possible to accidentally set the ports of two or more instances to the same port. This causes a conflict between those instances, and is indicated by highlighting in GoPxL Manager.
To correct this, select one of the instances, click Modify, and change the duplicated port to a different one. You can also delete any instances that use duplicate ports.
Application Settings
The following application settings are available:
| Parameter | Description |
|---|---|
|
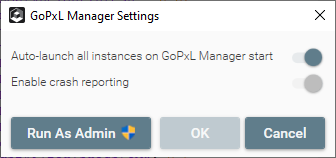
Auto-launch all instances on GoPxL Manager start |
When enabled, all instances not installed as a service will automatically start when GoPxL Manager starts. (Instances installed as a service will start when the computer is started.) |
|
Enable crash reporting |
If a PC instance of GoPxL crashes, a report will be generated. This can be useful if you need to troubleshoot problems with LMI support. LMI recommends leaving crash reporting enabled. To enable or disable this setting, you must be running GoPxL Manager as an administrator. To do this, click Run As Admin. The application will restart and let you make the change. After making the change, you should close GoPxL Manager and start it again. If you choose to disable crash reporting, an icon on the Settings button will indicate that |
Instance Settings
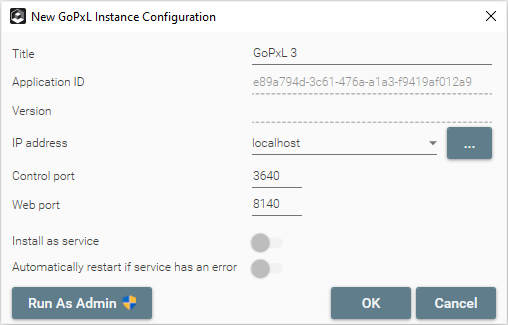
When adding or modifying an instance, you can change various settings (see Instance Configuration).
To add an instance, click Add and configure it if needed, and then click OK.
To modify an instance, select an instance in the list of instances and click Modify. To make changes to an instance, it must be stopped; select the instance and click Stop if needed.
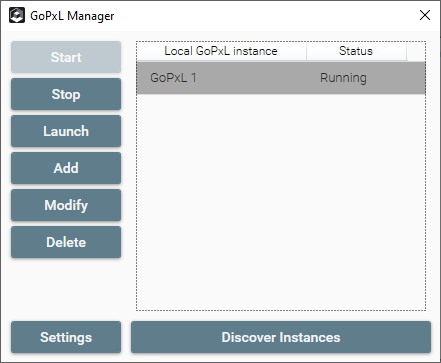
GoPxL Manager with one instance running.
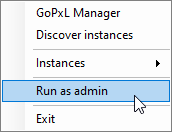
To change the settings of a service instance, and to delete, start, or stop a service instance, you must be running GoPxL Manager as an administrator. You can do this by clicking Run As Admin in the Instance Configuration dialog (see above), which restarts GoPxL Manager with administrator rights. You can also run right-click its icon in the Windows taskbar and click Run as admin.
| Parameter | Description |
|---|---|
|
Title |
The name of the instance in GoPxL Manager. |
|
Application ID |
The ID of the GoPxL instance. Not editable. |
|
Version |
The version of the GoPxL instance. Not editable. |
|
IP address |
The IP address of the instance. You can select an available address on your PC from the dropdown, or manually specify the address. |
|
Control port Web port |
The main ports the instance uses. These must be unique for each instance.
Web port The port you use when connecting to the instance, for example, to http://127.0.0.1:8120/.
Control port The port you use with the GoPxL SDK and REST API (see GoPxL SDK and REST API). |
| Install as a service |
When this setting is enabled, the instance is installed as a service. A PC instance installed (and running) as a service can run a sensor without the need for a user to be logged into Windows. |
| Automatically restart if service has an error | If an instance of GoPxL is configured to be a service and it has an error, it will restart automatically. |
Accelerating a Sensor
You accelerate a sensor (or group of sensors) by connecting it to a PC instance of GoPxL.
To accelerate a sensor
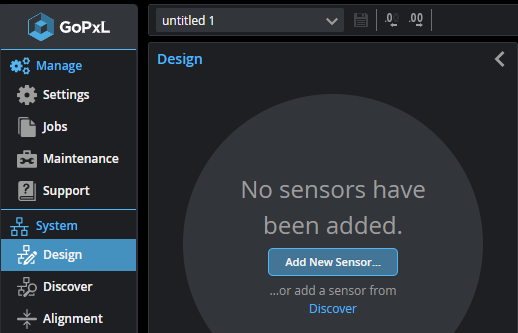
| 1. | In the browser, go to the System > Design page and click Add New Sensor... |
| 2. | In Add New Sensor, choose the scan engine appropriate for your device |
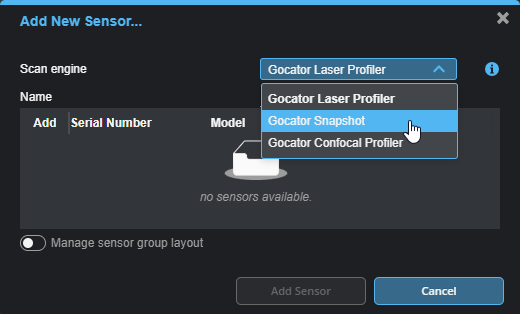
| 3. | Click next to the device you want in the Add column, and click Add Sensor. |
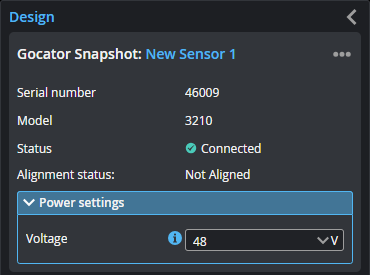
You can optionally set the name of the sensor.

The physical sensor is now connected to the PC instance of GoPxL and is automatically accelerated.
You access the sensor via the IP address of the PC instance, through which you control and configure it.
Stopping Acceleration
To remove a sensor from a PC instance
| 1. | In the GoPxL interface of the PC instance, go to the System > Design page. |
| 2. | With single G2 sensors, click the three dots menu ( ) and click Remove or Remove sensor from group. ) and click Remove or Remove sensor from group. |
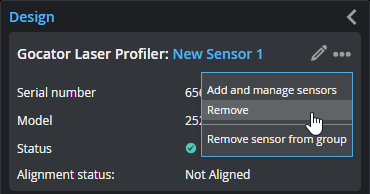
Remove: Choose this to remove the sensor and the sensor group containing it. If you have started configuring settings on the Inspect > Scan page, choose the next option instead.
Remove sensor from the group: Choose this if you have started configuring settings on the Inspect > Scan page and just need to add a different sensor to the sensor group.
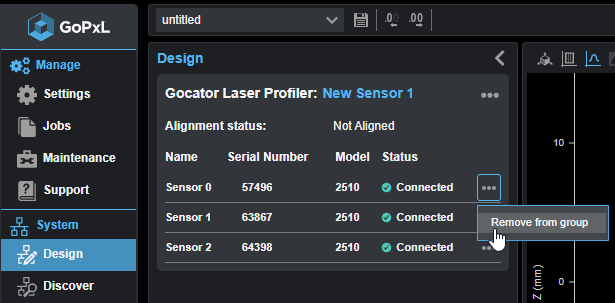
| 3. | With multi-sensor G2 systems, click the three dots menu () in the row containing the sensor you want to remove, and click Remove from group. |
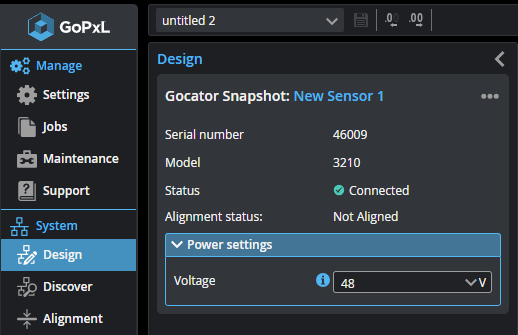
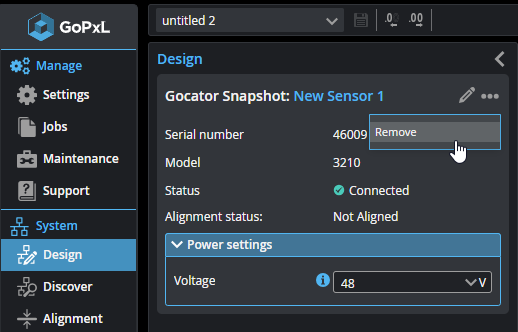
| 4. | With G3 sensors, click the three dots menu (), and choose Remove. |
The sensor is removed from the PC instance.
Loading Scan Data
To examine previously recorded scan data offline, you load a .gprec file into the PC instance of GoPxL.
|
|
You can also load a backup file or a support file to examine previously recorded scan data. |
To load recorded data (.gprec)
| 1. | In the GoPxL interface, above the data viewer, click the Upload replay file button. |

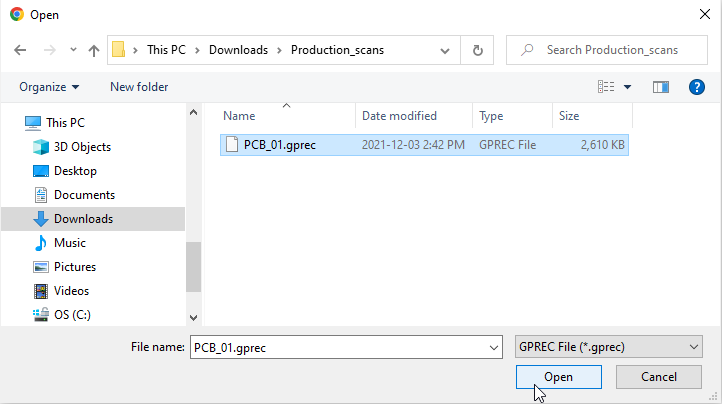
| 2. | In the Open dialog, locate and select the recording (.gprec) you want to load, and click Open. |
The recording loads in GoPxL, and GoPxL automatically switches to Replay mode.
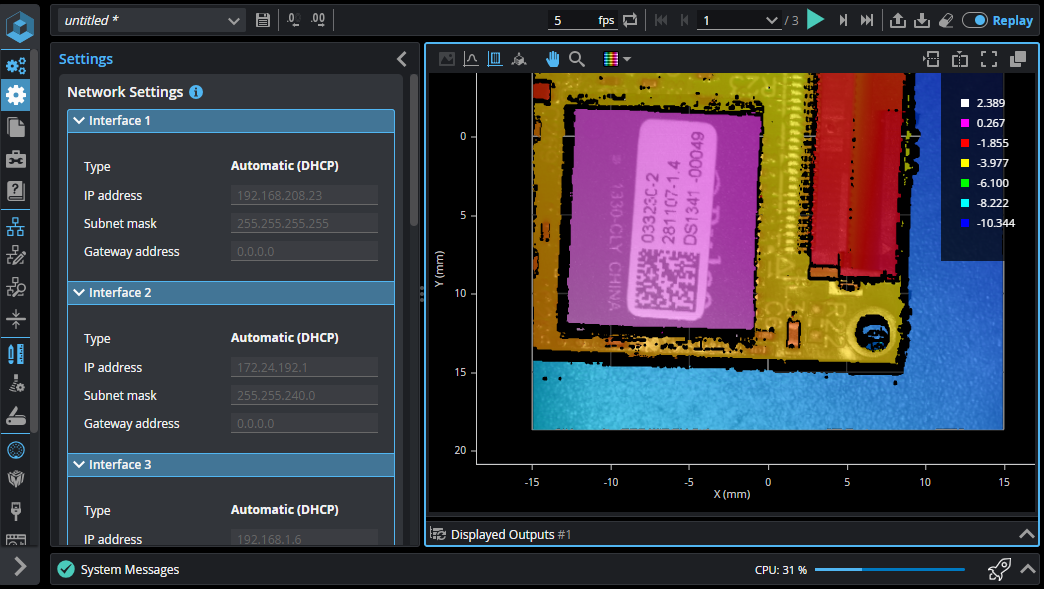
You can now examine the recordings and configure tools using the data.
| 3. | Use the replay controls above the data viewer to move through the frames, go to a specific frame, toggle and configure the speed of repeat frames mode (continuous loop), and so on. |
Hover over the replay controls for tooltips describing their function.

Using repeat frames mode with a slow frame speed is useful for adjusting measurement tool settings and seeing the impact on scan data, without having to click Start or step through the frames of scan data manually. Repeat frames mode is also useful for demos.