HMI
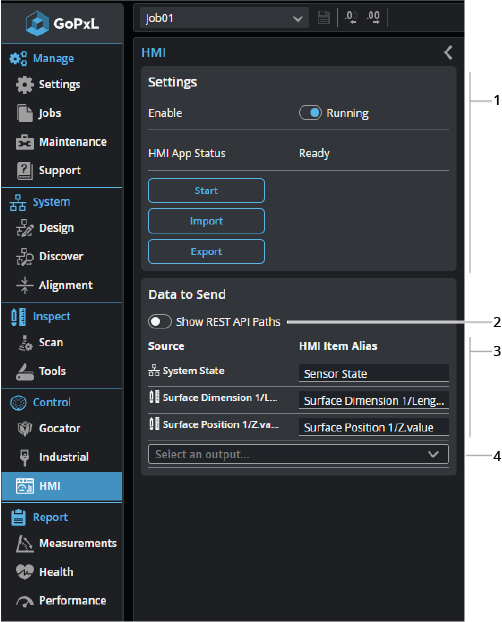
The HMI panel lets you enable GoHMI, choose which outputs you want to send to an HMI application, and start communication with the HMI.
You configure the HMI on the Control > HMI page. For details, see GoHMI and GoHMI Designer.

|
When you start HMI on a PC instance of GoPxL, a helper application (WebIQ Server) launches. |
| Element | Description | |
|---|---|---|
|
1 |
HMI |
Lets you enable the HMI service. After you have enabled the service, the following functions are available:
Start / Stop Starts / stops the HMI application. After starting the application, a View live button is available, which lets you open the HMI in a browser tab.
View live Opens the HMI in a browser tab.
Import / Export Lets you import and export HMIs so that you can transfer them to a different platform, for example, going from a PC to a GoMax device. |
|
2 |
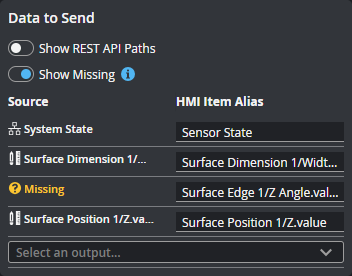
Show REST API Paths |
Toggles between showing the full internal path to an output and an alias, which is simplified. In GoHMI Designer, you will see the REST API path; toggling this on can help make it easier to find which item is which. |
|
3 |
Show Missing |
If the source for a connection is missing (that is, the tool providing the source has been removed in the job, or an output has been disabled), this option is displayed. Enabling it lists connections whose source can't be found. You can delete the missing connection (by hovering over the row in Data to Send and clicking the trashcan icon) or enable the source if it has just been disabled.
|
| 3 | Tool & Sensor Outputs |
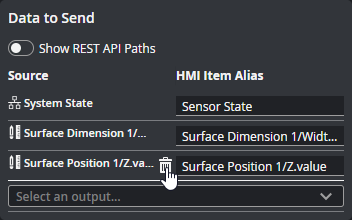
The list of outputs (scan data and tool outputs) that GoPxL will send to an HMI. You can remove an output from the list by hovering over it and clicking the trashcan icon.
|
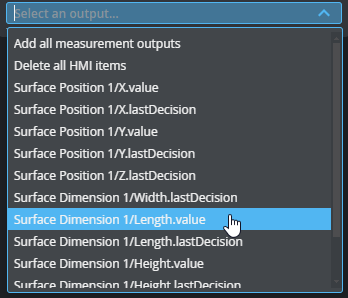
| 4 | Output selector |
Lists the available outputs. Click an output in the drop-down to add it to the outputs GoPxL will send to an HMI.
|