Connect - Creating a System & Networking
You use the Connect page to see available devices, create a sensor system containing two or more sensors, and also configure network settings. You can also identify devices that are unavailable (either because of a GoPxL version mismatch, or because a sensor is already running through another PC instance of GoPxL). For information on running a sensor through a PC instance of GoPxL, see Running GoPxL on a Windows PC.

|
GoPxL does not currently support mixed-model multi-sensor systems. |
Adding Sensors and Configuring Multi-sensor Systems
To create a dual-sensor system
| 1. | In a web browser, connect to the device or PC instance of GoPxL that will control the other devices. |
The default Gocator sensor IP address is 192.168.1.10. If you don't see your sensor in the browser, see GoPxL Discovery Tool.
It may be useful to connect to the leftmost sensor first.
| 2. | In the GoPxL interface, go to the Connect page and click Add device. |
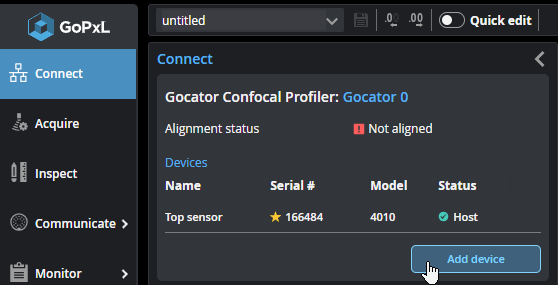
If you don't see sensors you expect to see in the table at the top, close the dialog (Close icon  or Done) and observe which sensors are listed in Visible sensors. These are the sensors that have been detected on the network. If you still don't see the sensors you expect, use the Discovery tool (for more information, see GoPxL Discovery Tool).
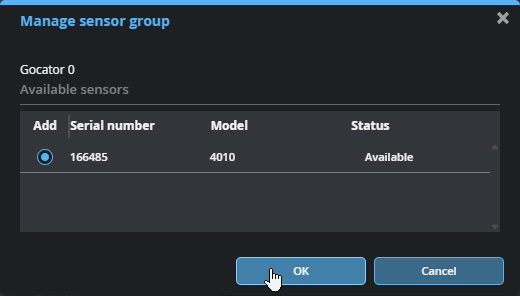
| 3. | In the dialog, select the sensor you want to add to the sensor group and click OK. |
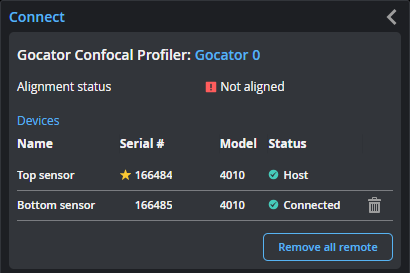
The sensor is added to the sensor group.
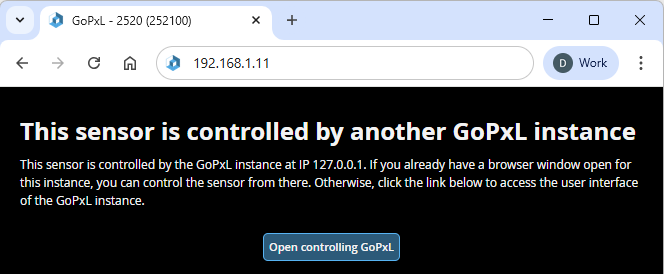
After you have grouped a sensor with another sensor, the web interface of the grouped sensor (also known as a "remote sensor") will show that it's currently being controlled by another GoPxL instance, namely, GoPxL running on the sensor on which you configured the system.
Removing a Sensor from a System
To remove a sensor from a dual-sensor system, click the trashcan icon in its row, or click Remove all remote.

Resetting the Layout
In some situations, you may need to reset the layout. Clicking Reset Layout moves all added sensors to the top row and sets their orientation to Normal.
Network Settings
To configure the network settings:
| 1. | Go to the Connect page. |
| 2. | Specify the type (Manual or DHCP), IP, subnet mask, and gateway settings. |
The sensor can be configured to use DHCP or assigned a static IP address by selecting the appropriate option in the Type drop-down.
| 3. | Click Save Changes.... |
You will be prompted to confirm your selection.
The sensor restarts, using the new IP address. It may take several seconds for the sensor to become available.