Running GoPxL on a Windows PC
GoPxL is the software you use to configure Gocator sensors. Typically, you connect directly to a sensor's IP address via a web browser, and use the GoPxL software running on the sensor to configure and run the sensor. (By default, a sensor's IP address is 192.168.1.10. If you can't find a sensor, see GoPxL Discovery Tool.)
You can also run GoPxL on a Windows PC. We call GoPxL running on a PC a "PC (or local) instance of GoPxL." A PC instance of GoPxL lets you do the following:
-
Accelerate sensors: For applications where performance is critical, you should run a sensor through a PC instance of GoPxL. After you connect a sensor to an PC instance of GoPxL, the PC instance automatically starts accelerating it, handling the processing of the scan data, rather than the sensor. This improves system performance, potentially letting you increase scan rates or add more tools.
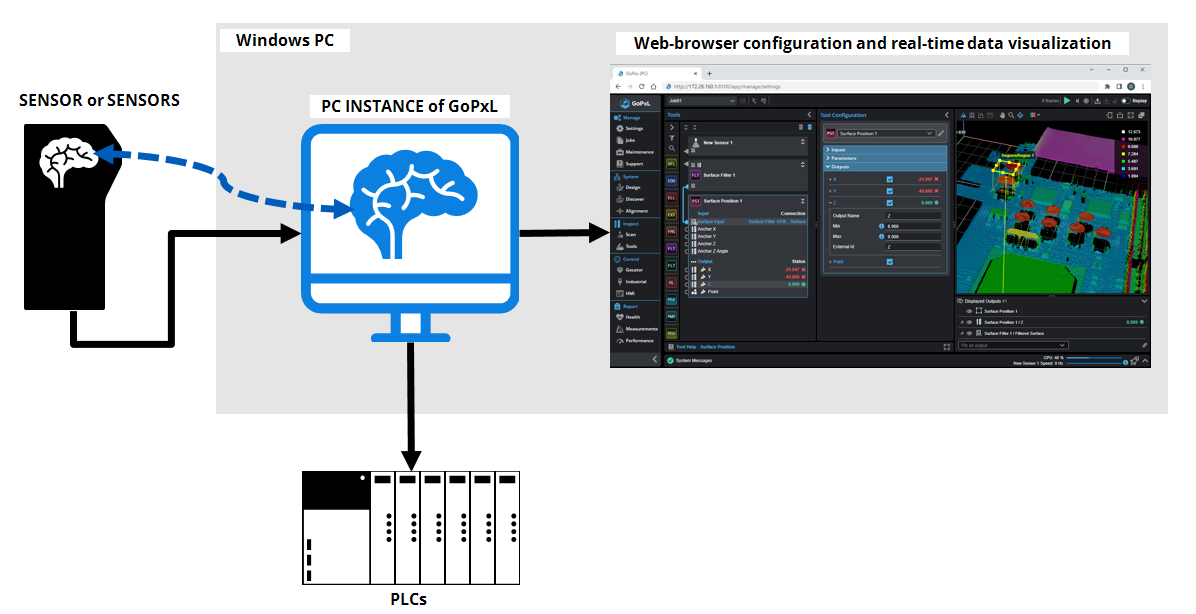
- Load previously recorded scan data to examine it or to configure measurement tools offline, without a sensor, using that data. For more information, see Loading Scan Data.

|
For information on the ports a PC instance uses (for example, in order to ensure ports are not blocked over your network), see Required Ports. |
The user interface of GoPxL running on a sensor and GoPxL running on a PC is largely the same, with the exception of the following:
- When you connect directly to a sensor, a sensor group containing the sensor is already created. When you launch GoPxL on a PC, no sensor group is created. You must do this yourself by adding a sensor to the PC instance. For more information on this, see Accelerating a Sensor. For information on sensors and sensor groups, see Sensors, Sensor Groups, and Systems.
- When running a sensor through a PC instance of GoPxL, you can't upgrade or restart the sensor. You must remove the sensor from the sensor group (or delete the group) and connect to the sensor directly to perform these operations.

|
Job files you create in a PC instance of GoPxL are separate from any jobs that are on the sensor. Be sure to back them up if ever you need to run them directly on the sensor. |
System Requirements
The following are the system requirements for using GoPxL on a Windows PC:
- Processor: x86-64 (Core i3 or equivalent)
- RAM: 8 GB
- Hard drive: 64 GB
- Operating system: Windows 10 (32-bit and other OS are not supported)
- Display: 1366 x 768
To accelerate more sensors or to run the system at higher speeds, use a computer with greater system resources.
Note that acceleration of line profile sensors does not currently make use of a computer's graphics card.
Launching GoPxL on a Windows PC
The first time you launch GoPxL for Windows, a GoPxL instance is automatically created and started, and the GoPxL interface opens in your default browser. You use the GoPxL Manager application (which is started when you start GoPxL for Windows) to add, remove, and configure instances. The following assumes you have connected a sensor to a network and that you can access its web interface.
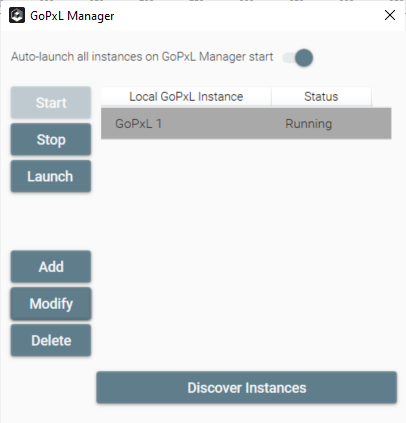
The GoPxL Manager application. An instance is automatically added the first time you launch GoPxL.
To launch a PC instance of GoPxL
| 1. | On the PC connected to the sensor, download and unzip the GoPxL Utilities package (14631-x.x.x.x_SOFTWARE_GoPxL_Utilities.zip). |
The version of the package must match the version of GoPxL on the sensor.
| 2. | From the GoPxl folder, launch GoPxL x64. |
GoPxL Manager creates a local, PC-based instance of GoPxL and launches it in a new tab in your default browser, using IP address 127.0.0.1.
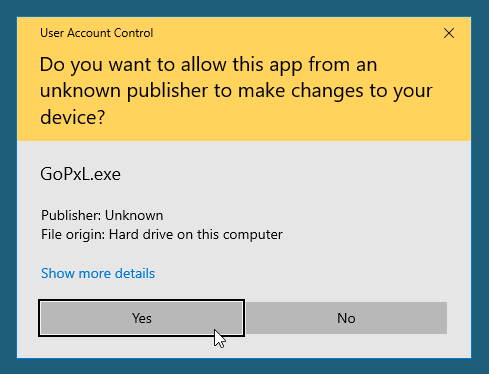
Windows will display a User Account Control dialog. Click Yes.
Additionally, your firewall may ask if you want to allow the GoPxL Service Application to communicate over your network. The Windows firewall default is to only allow communications over Private networks. To avoid issues, LMI recommends allowing communication over both Public and Private networks.
At this point, you can do one of the following:
-
Add one or more sensors to the PC instance to accelerate it. For information on adding a sensor to a sensor group, see Accelerating a Sensor.
-
Open scan data someone has previously recorded (in a .gprec file) and examine the data or use it to configure measurement tools without taking your sensor system offline. For more information, see Loading Scan Data. (For information on the file formats used with GoPxL, see File Formats.)
Accelerating a Sensor
You can accelerate a sensor by connecting it to a PC instance of GoPxL.
To accelerate a sensor
| 1. | In the browser, go to the System > Design page and click Add New Senor... |
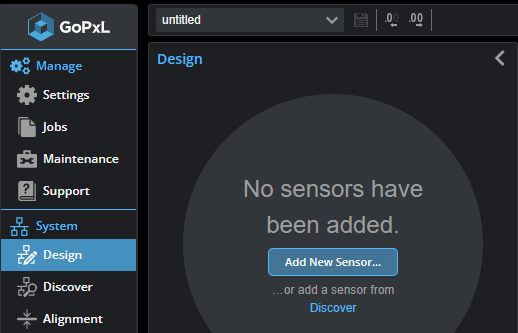
| 2. | In Add New Sensor, choose the scan engine appropriate for your device |
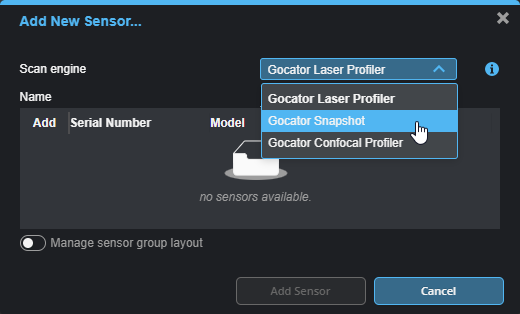
| 3. | Check the Add checkbox next to the device in the table, and click Add Sensor. |
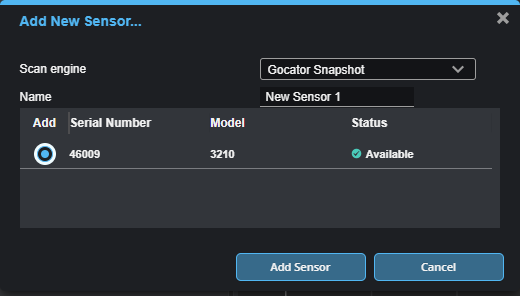
The physical sensor is now connected to the PC instance of GoPxL, and you control and configure it through the PC instance. The sensor is automatically accelerated.
For information on enabling and configuring GoHMI, see GoHMI and GoHMI Designer.
Stopping Acceleration
To remove a sensor from a PC instance
| 1. | In the GoPxL interface of the PC instance, go to the System > Design page. |
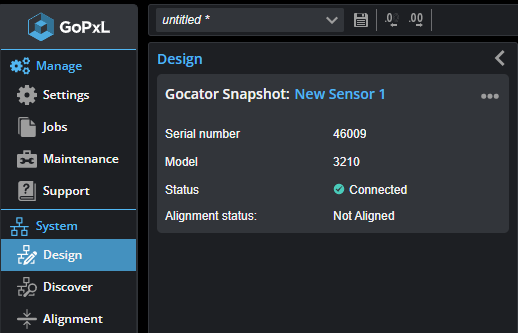
| 2. | With single G2 sensors, click the three dots menu ( ) and click Remove or Remove sensor from group. ) and click Remove or Remove sensor from group. |
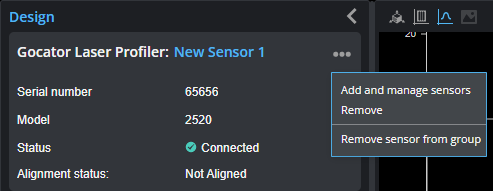
Remove: Choose this to remove the sensor and the sensor group containing it. If you have started configuring settings on the Inspect > Scan page, choose the next option instead.
Remove sensor from the group: Choose this if you have started configuring settings on the Inspect > Scan page and just need to add a different sensor to the sensor group.
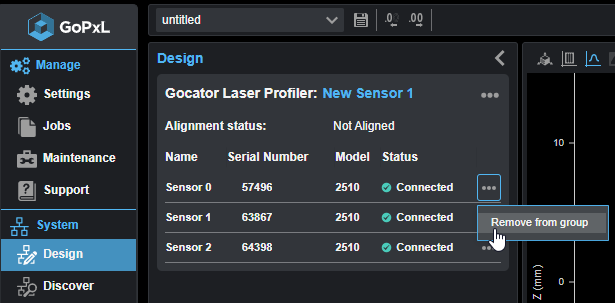
| 3. | With multi-sensor G2 systems, click the three dots menu ( ) in the row containing the sensor you want to remove, and click Remove from group. ) in the row containing the sensor you want to remove, and click Remove from group. |
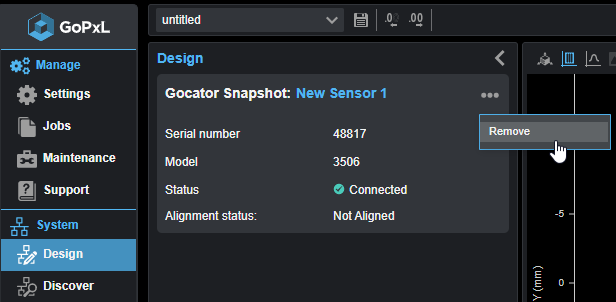
| 4. | With G3 sensors, click the three dots menu ( ), and choose Remove. ), and choose Remove. |
Loading Scan Data
To examine previously recorded scan data offline, you load a .gprec file into the PC instance of GoPxL.
To load recorded data (.gprec)
| 1. | In the GoPxL interface above the data viewer, click the Recording File Actions button. |
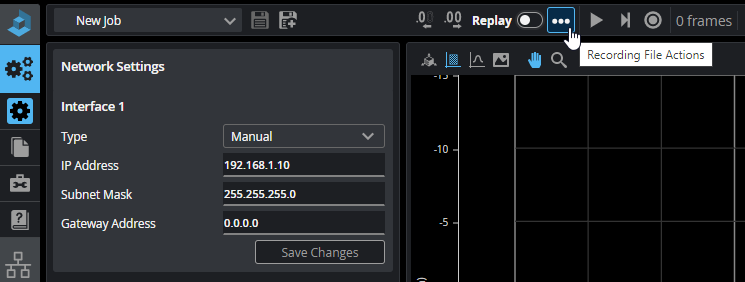
| 2. | In the drop-down that appears, click |

| 3. | In the Open dialog, locate and select the recording (.gprec) you want to load, and click Open. |
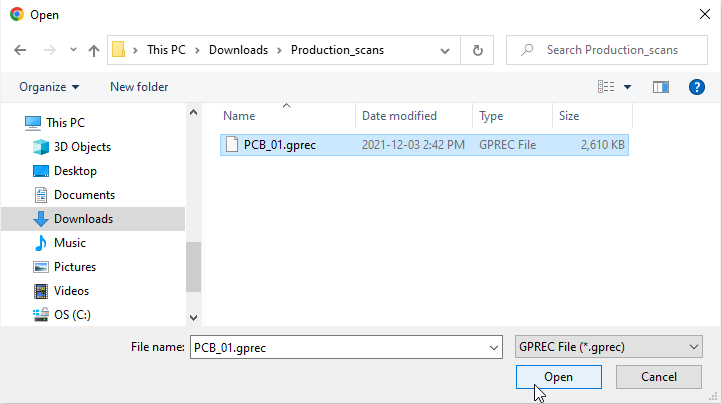
The recording loads in GoPxL, and GoPxL automatically switches to Replay mode.
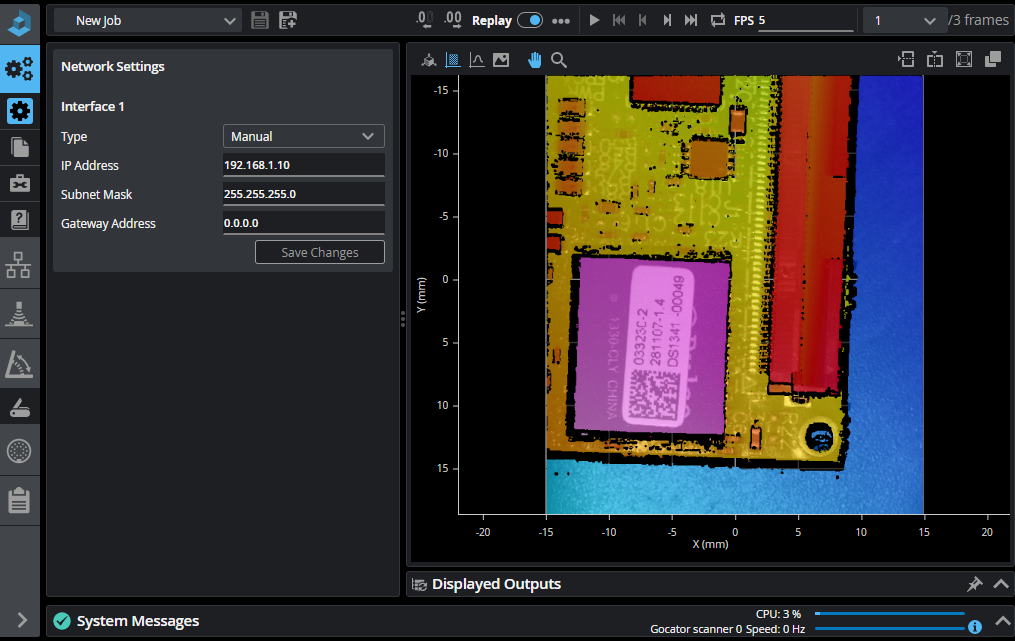
You can now examine the recordings and configure tools using the data.
| 4. | Use the replay controls above the data viewer to move through the frames, go to a specific frame, set continuous loop speed (FPS), and so on. |
Hover over the replay controls for tooltips describing their function.

Using continuous loop with a slow frame speed is useful for adjusting measurement tool settings and seeing the impact on scan data, without having to click Start or step through the frames of scan data manually.
Continuous loop is also useful for demos.