Track Editor
You use the track editor in conjunction with the Surface Track tool. The track editor lets you configure "path" and "ruler" information on a frame of scan data from a sensor or GoMax NX device, a PC instance of GoPxL, or a GoPxL backup file. The Surface Track tool uses this information to inspect targets along the defined path. For more information on paths, rulers, and other concepts related to the Surface Track tool, see Surface Track.
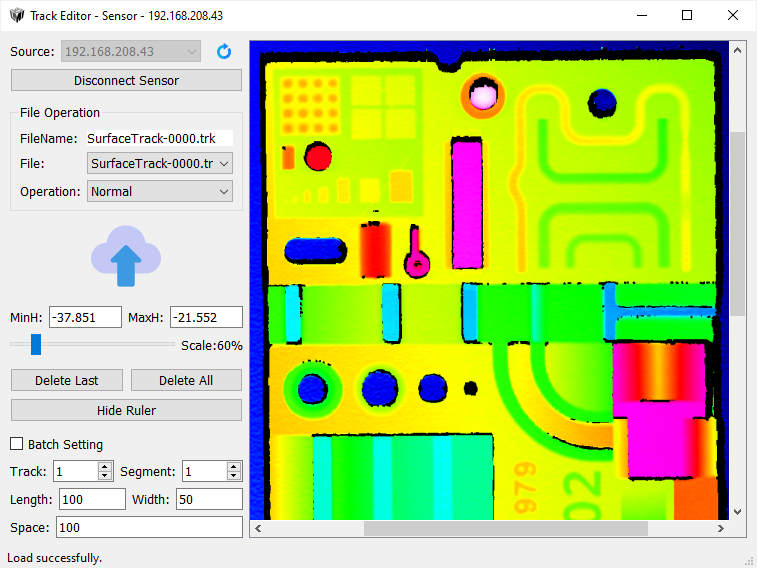
The track editor
In the track editor, you define one or more paths, and configure rulers along these paths.
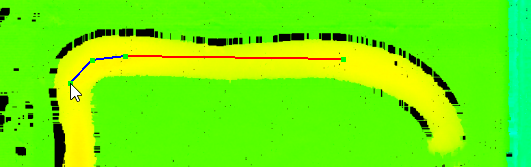
Closeup of the track editor window, showing a track of material on a surface (yellow on green),
path points (green dots), a path (blue segments; red segment for the currently selected segment), and rulers (white rectangles).

|
The following assumes that you have already scanned a representative target and created a track file from within the Track tool. For more information, see the first steps of To configure the Track tool:. |
To load and work with scan/track data:
| 1. | In the track editor, in the Source drop-down, choose one of the following: |
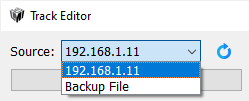
- An IP address: Choose this option to edit a track file on a sensor or a GoMax NX device, or in a PC instance of GoPxL.
- Backup File: Choose this option to edit a track file in a backup file you have created from a sensor or a PC instance of GoPxL and saved in the PC's file system. For more information on backup files, see Backup and Restore.
|
|
If you only see "Backup File" but expect to see an IP address, make sure the device or PC instance is running and is connected to your network, and then click the Reset button ( |
 ).
).| 2. | If you have chosen an IP address, click Connect Sensor. |
The track editor loads the data from the device or PC instance.
| 3. | If you have chosen a backup file, click Load Backup, navigate to the location of the backup file, select it, and click Open. |
The track editor loads the data.
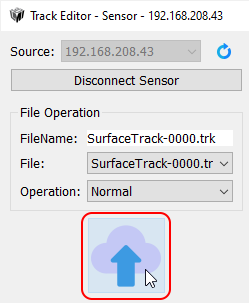
| 4. | Under File Operation, in File, select the track file you have created in the Surface Track tool, and under Operation, choose Load. |
|
|
If you only see "External" under File, it means no track file has been defined on the device / PC instance or in the backup file. You can use "External" to load a .trk file from the PC's file system. Otherwise, create a track file in the Surface Track tool, and then disconnect and reconnect the source. |
The editor loads the specified track file.
For a complete list of the file operations, see File operations.
| 5. | Do one or more of the following: |
- Move the slider to the left or right to zoom in or out in the editor's viewer.
- Move the data in the track editor's window using the scrollbars or the mouse wheel.
- Set MinH and MaxH and then reload the track data to assign a narrower height range to the height map colors. This may help make the track clearer in the editor. This does not change the height map data.
After you have loaded the data, you must add a path and configure its rulers.
To add and configure a path and its rulers:
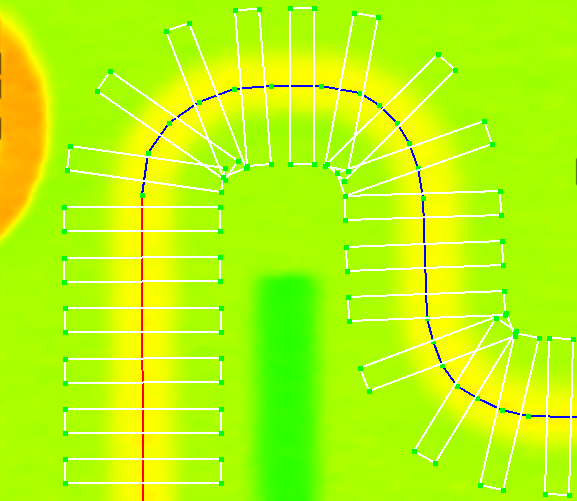
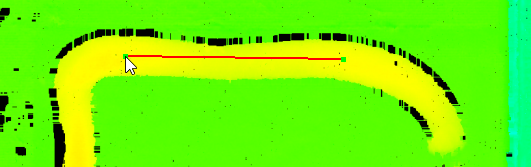
| 1. | In the track editor, click on the middle of the track somewhere in the scan data, move the mouse pointer to another location, and click again. |
A red segment between the first two green path points appears in the editor window.
You can move path points using the mouse at any time to adjust the path. You can also delete the last point by clicking Delete Last. To delete all path points, click Delete All.
| 2. | Continue clicking along the track to add more path points, building up the path. |
When adding points on corners, add more points to follow the track more precisely.
| 3. | Continue clicking until you complete the path along the track. |
| 4. | Modify the ruler settings. |
For more information, see Ruler Settings.
| 5. | Under Operation, click Save to save the path information to the data. |
For a complete list of the file operations, see File operations.
| 6. | Click the Sync button. |
The changes are synchronized to the source (device or backup file).
Ruler Settings
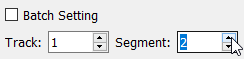
After you have finished adding a path, you can configure the rulers on the path (the dimensions and the spacing of the rulers). You can choose to apply dimensions/spacing to rulers in all segments at the same time by checking Batch Setting.
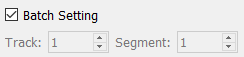
Otherwise, you must move through the individual path segments by clicking the spinner control in the Segment field and setting the ruler dimensions for each segment.
The following table lists the ruler settings available in the track editor: